Accounting info. Directory of counterparties Where are the counterparties in 1s 8.3
Creating a counterparty in the 1C program is, as we understand, a mandatory action. Almost any enterprise that operates and receives income from its customers must have at least one counterparty to whom, for example, it can issue an invoice for payment. The procedure for adding a new counterparty to the 1C (IB) information base is simple, although it has some nuances.
Let's consider the process of creating a new client account in the 1C Accounting for Ukraine 8.2 configuration. To be fair, it is worth noting that this procedure is very similar in other 1C configurations. That is, having gone through this example once, when working with other configurations it will be enough to simply remember this experience.
In most cases, it all comes down to filling out an account card; sometimes you need to create a new group for a new type of counterparty.
You can go to the directory of counterparties by selecting the “Purchase” or “Sale” section in the main menu and clicking on the “Counterparties” button. Clicking the button of the same name in the “Buy” or “Sell” function panel tabs will lead to the same result. There is also the option to click the “Operations” menu item, select “Directories” and select “Counterparties” from the list.


In the directory of counterparties, let’s say, let’s create a new group for the type of counterparties - “Important postalniks” (“Important suppliers”). To do this, by clicking on the “Add group” button (the menu button that shows a folder with a green plus sign), fill in the details of the new group. Please note that after creating a new group, you can transfer existing clients to it as described in the article - After filling in the details, click “OK”.


We go to the new group by clicking the arrow next to the folder icon. Next, we will create a new counterparty itself. To do this, press the “+Add” menu button or the “Ins” key on your keyboard.

We fill in the details of the header and then, in order, the details of the tables on the tabs below. Note that the name field can be filled out in such a way that it is clear to the accountant when searching and selecting the desired entry in the directory; this field will not be present in printed forms in most cases. The “Full name” field will be used there. After filling out the first bookmark, move on to the second. To do this, click the “Record” button, after which all bookmarks will become available.

On the second tab, fill in the address and contact information. The transition to the forms for entering these details occurs by clicking the “…” button (Fig.). To make a new entry for contacts, you need to click on the “+” button in the bottom menu. Next, fill in the intuitive details.


Actual address:


The information in the “Contacts” section should be treated carefully, because... The data in this section is used in documents generated by 1C.

Don’t forget to fill out the second contacts tab “Additional”, where you enter the positions of contact persons.

After checking the results of filling in the details on the “Contacts” tab, go to the “Accounts and Agreements” tab


The attentive reader will not hide the fact that after moving to the third tab in the section “Counterparty Agreements”, the entry “main” appeared. Indeed, 1C automatically created this record in order to conduct all mutual settlements with the client. The accounting structure of the program is organized in such a way that all transactions with the counterparty are carried out on the basis of the data specified in the contract. Let's fill the main one with real content. To do this, select the contract entry and click the menu button with the green pencil icon “Change”.


Please fill out the contract details carefully. The correctness of your accounting with the client will depend on this. For example, by filling out the “Type of agreement” position incorrectly, we risk ending up with an incorrect operating principle in mutual settlements with the counterparty. Those. there is a significant difference in the type of contract “with the supplier” or “with the buyer” or “with the principal”, etc.

 Having filled in the data on the next tab, it is convenient to click the “Record” button at the bottom, while you save the entries made and do not risk losing them in the event of any sudden problems. At the end of editing, click the “OK” button to completely enter the new contract data into the IB.

After creating each bank account, save the data with the “OK” button.

And, after editing the details of contracts and bank accounts, we move on to the last tab of the new counterparty’s card, “Taxation Schemes”.
Here, similar to the actions on the previous tabs, to create a new entry, press the “+” button or the Ins key. As a result, a record of the counterparty taxation option will be created, in which you need to specify the period and the actual scheme.

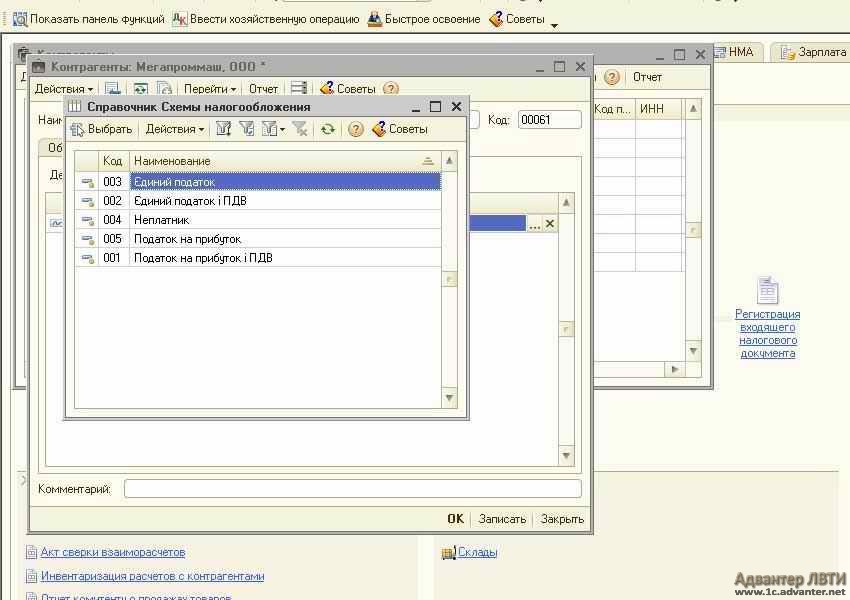 Select the desired tax scheme option and click the “Record” button. The data entered in the tax schemes field will be used when generating the Profit Declaration data.
We check all entered data and save the new counterparty’s card by clicking the “OK” button.
At this point, the creation of a new group and a new counterparty card can be considered complete.
If you have any difficulties, we will definitely help.
You can discuss the operation and ask questions about it at.
Directory "Counterparties" in 1C Enterprise 8.2 contains information about all individuals and legal entities with whom your company cooperates. These could be buyers, suppliers, your employees, employees of banks and other institutions. The easiest way to find the “Counterparties” directory is through the “Operations” - “Directory” menu.
Next, we need to manually start writing the name of the directory we need. In our case, these are “Counterparties”. As you can see, the 1C program automatically finds the desired object for us. Now we go to the “Counterparties” directory to become better acquainted with it.

directory contractors 1c enterprise 8.2
See also the reference book "Nomenclature"
In the “Counterparties” 1C directory that opens, we will see a list of all individuals. and legal persons For convenience, you can structure all contacts into folders, for example, “our employees” or “legal. faces." Below are all the additional data in several tabs. Here you can enter or view contact information, service history, events and settlements.

directory contractors 1c enterprise 8.2
There is probably nothing complicated at this stage. Let's go a little deeper and look at a separate element of the “Counterparties” directory in 1C Enterprise 8.2.
There are a lot of settings here for filling out information about each employee, supplier or customer.

directory contractors 1c enterprise 8.2
One of the important settings is the “Buyer” or “Supplier” field to clarify who exactly this person is for our company. If the employee is neither one nor the other, there is no need to tick the boxes. On the “Contacts” tab, you can specify or view information about counterparties, for example, add phone numbers or contact persons.

directory contractors 1c enterprise 8.2
On the “Accounts and Agreements” tab, you can configure the necessary bank accounts and agreements for mutual settlements.

directory contractors 1c enterprise 8.2
Also, an important tab is the “Taxation Schemes” tab. Here you can add a new scheme, specifying the period and type of taxation.

directory contractors 1c enterprise 8.2
After meeting directory "Counterparties", you can proceed to study the documents “Receipt of goods and services” and “Incoming payment order”.
One of the main operations when working with the 1C 8.3 and 8.2 “Trade Management” software product is filling out a directory called “Counterparties”. Counterparties in the above programs are a directory that contains a list of all buyers and suppliers with whom a certain company works. In almost all cases, the directory has 2 groups: buyers and suppliers.
Instructions for creating Counterparties in the 1C program
We will describe all the actions step by step. To fill out the “Buyers” group you need to go through 3 steps:
1. In the top menu of our software product, select the button called “Directories”, then - “Counterparties” (suppliers and buyers) - “Counterparties”. Once done, create two groups: suppliers and buyers. First, let's fill in the "Buyers" group. To do this, open it, click the button called “Insert”. In the open window, enter the information: name, that is, the short name of the buyer. Next, select an individual or legal entity, and check the box labeled “Buyer.” Enter the full name, and - if necessary. And at the end, click on the key called “Record”.
2. In the second stage, find a tab named “Contacts” (at the top of the window), and then left-click twice on the line called “Legal Address”. In the open window, fill in the required data - “Write” - “Yes” - “OK”. Then go to the tab called “Accounts and Agreements,” which contains the “Bank Accounts” section. Next, press the key that looks like a green circle with a white cross. Then enter the account number, BIC, in the window. And we need a correspondent. The account and bank will appear automatically if you perform operations in the following sequence: click on the line “Cor. account" - "Write" - OK.
3. And the last stage of work is devoted to a group called “Buyers”. At the bottom of this window, double-click on “Main Agreement” with the left mouse button. Next, in the middle section of the window, a tab named “Advanced”, then set the desired price type - “Record” - “OK” - again “Record” - “OK”.
Filling out the “Suppliers” group is similar to filling out the group called “Buyers”.
To begin, open the group called “Suppliers” and click on the button named “Insert”. In the second stage, perform the same steps as in the first stage in the “Buyers” group. The only difference is that the checkbox now needs to be checked at the "Supplier" mark. The third point is similar to the third point of the “Buyers” group. Then look at the bottom of the window - double-click on the button called “Main Agreement”. In the middle part of this window, select the “Advanced” - “Price Type” tab. Next, press the key with 3 dots - the “Insert” key. In the window, in the line with the name “Name”, enter “Purchase price”, in the line with the name “Item price type” select “Purchase price”, check the box for VAT - “Write” and “OK” - “Enter” key - “Write” " and "OK".
In many companies, contracts with customers are concluded at a certain frequency, for example, every quarter or year. The contract often specifies additional conditions: the type of sales prices, and also specifies a list of goods that the client must purchase during the term of the contract.
Let's consider creating contracts with additional conditions in the 1C: Trade Management program, ed. 10.3".
Our organization entered into an agreement with the counterparty Mobil for the 1st quarter of 2012. Under the terms of the agreement, we will sell goods at wholesale prices. In addition, as part of the contract, the counterparty must purchase the following goods:
Creating an agreement with a counterparty
An agreement with a counterparty is created in the counterparty card. Let's open the list of counterparties, find the Mobile counterparty and open it.
Menu: Directories – Contractors (buyers and suppliers) – Contractors
Let’s go to the “Accounts and Agreements” tab; in the lower table you can view, edit, and create agreements with the counterparty:
Note: one of the contracts with the counterparty is the main one - it is automatically entered into the documents for the counterparty. It is more convenient to make a new contract the main one if you plan to use it more often than other contracts with this client. In order to make a contract the main one, select it in the list and click the “Main” button above the table.
Click the “Add” button and create a new agreement.
In the agreement we indicate the name - “Sales Agreement 1st quarter of 2012”, the type of agreement - “With the buyer”, fill in other parameters (currency of mutual settlements, type of mutual settlements, etc.).

On the “Additional” tab, you can specify the type of sales prices for this agreement. Let's choose the wholesale price type. Thanks to this, all sales under this agreement will be automatically processed by the program at wholesale prices:

Before specifying the additional conditions themselves, the contract must be written down - click the “Write” button.
Indication of additional conditions under the counterparty agreement
To indicate the terms of the contract, a special document “Terms of supply under contractor agreements” is used. You can enter the document in the contract on the “Terms of Contract” tab.
You can view a list of all documents here:
Menu: Documents – Customer relationship management – Terms of delivery under counterparty agreements
Let's create a new document in our agreement using the "Add" button. The document already indicates the counterparty and the contract; the period will be set from January 1 to March 31, 2012.
The document also indicates the frequency of compliance with the conditions. The program will check whether the conditions are met by the counterparty in each specified period. Since we have conditions for the entire duration of the contract, we will set the frequency “Quarterly”:

- Total amount of purchases.
- A list of purchased goods indicating quantity, price and amount.
Note: Filling in the total amount is required; the list of goods is not required.
The most popular ways to fill out the terms and conditions of counterparty agreements in a document
Method 1
Only the total amount is indicated, the list of goods is not filled out. In this case, the only condition of the contract is the purchase for the specified amount; it does not matter what goods the client purchases.
Method 2
A list of goods required for purchase is indicated. The amount is calculated automatically. Thus, the client, under the terms of the contract, is obliged to purchase a certain quantity of goods.
Method 3
The total amount is indicated, as well as a list of goods with prices different from wholesale prices. Those. under the terms of the contract, the client will purchase the goods at a different, lower price (the program will automatically insert these prices into the sales documents). In this case, he must purchase goods for the specified amount.
In our document we will fill out a list of products, indicate the quantity and wholesale prices. To automatically calculate the total amount, click the “Set total amount” button.
Example of a completed document:

At the same time, we give the counterparty a lower price for laptops. The wholesale price for a laptop in our organization is 12,800 rubles, and we set the contract price at 11,500 rubles.
To simplify further work on the counterparty, let’s make the contract the main one - click on the “Main” button in the list of contracts:

Registration of sales under counterparty agreements with additional conditions
At the time of placing customer orders and selling goods to the client, the program must take into account all contract settings and additional conditions.
Let's create a document “Order to buyer”.
Menu: Documents – Sales – Customer orders
In the order, we will select the counterparty “Mobil”, the contract will be entered automatically, since it is the main one. In addition, the wholesale price type was immediately substituted in the document, since we chose it in the contract:

The list of goods includes 110 phones, 24 laptops, 3 TVs. Please note that the prices for the goods were automatically adjusted. The prices for the phone and laptop were determined according to the terms of the contract (the price for the phone is the same as the wholesale price, the price for the laptop is not the same), and the price for the TV is the wholesale price of our organization:

Click the “OK” button and close the document.
Note: To view wholesale prices, you can print a price list.
Menu: Directories – Nomenclature – Print price list

Based on the buyer’s order, we will create a sale of goods and services, and do not forget to enter the invoice:

Checking compliance with contract terms and conditions by counterparties
At the end of the contract period, it is important for managers to check whether the counterparty has fulfilled the specified terms of the contract. It is also important to monitor compliance with conditions during the term of the contract. At any time, the manager can view the current status of the terms of the contract; to do this, you can use the report “Fulfillment of conditions under counterparties’ agreements.”
Menu: Reports – Sales – Fulfillment of conditions under counterparty agreements
In the report we will see all contracts with additional conditions:

In the “Amount” column we see the required amount of purchases (945,000) and the actual amount of purchases under the contract - (1157,480). This means that the client has fulfilled the condition for the total amount of purchases.
Next, the report displays each product from the conditions document, the quantity planned for purchase, and the actual quantity of goods purchased by the client. We see that the client fulfilled the conditions for purchasing phones, but laptops were not purchased in the required quantity.
In this report setting, we also see detailed information for each sales document to a client. The report can be customized - set selections by counterparty or contract, change the composition of the output data. The report is configured using the “Settings” button.
Thus, we created an agreement with the counterparty and indicated additional conditions in it. During the term of the contract, we can monitor compliance with the conditions and adjust interaction with the client. It is important to understand that the program does not apply any sanctions to the client, even if he has not fulfilled the terms of the contract. Monitoring compliance with the terms of the contract and making decisions based on the results of work remains with managers.
The directory of counterparties in 1C 8.3 Accounting 3.0 is very important. It stores data about all suppliers and customers in your organization. Errors in this directory can be critical, especially with registration data.
You can access this directory through the “Directories” section.
Create a new counterparty from the list form that appears.
Automatic filling
In the header of the counterparty’s card, you can enter its TIN or name and click on the “Fill” button. In this case, the details will be automatically downloaded from the Unified State Register of Legal Entities/Unified State Register of Individual Entrepreneurs.

This functionality only works when connected to Internet support. The cost of access to the 1C Contractor service is 4,800 rubles/year.
If you are not connected, the program will display a corresponding message and prompt you to do so.

Click “Yes” and in the window that appears, enter your ITS login and password. It should have been provided to you along with the configuration supply agreement. If for any reason you do not have access to ITS, please contact us.


Manual filling
You can also fill in all these fields manually.
Please note that when entering the TIN and KPP, the program checks them. If the program already has a counterparty with such details, you will be notified about this. It is highly undesirable to duplicate counterparties. You yourself will then get confused in them.

The program also checks the entered TIN and KPP according to the format approved by the tax service.

If you have Internet support enabled, all counterparties will be checked for availability in the Federal Tax Service database.
Counterparties found in the Federal Tax Service by TIN and KPP will be displayed as follows.

Those counterparties that could not be found will be displayed as shown in the figure below.

In the form of a list of counterparties, for convenience, an automatic check for availability in the Federal Tax Service database is also implemented. The TIN of unfound counterparties will be highlighted in red.

Write down the counterparty you created after you have filled out and verified all the details.
Bank accounts
Another important detail in the counterparty’s card is his bank account. It is used for non-cash payments. We will transfer funds to the supplier to this account. If the counterparty is a buyer, then he will make payment from this account. Cashless payments are now the most popular.
In the counterparty's card, select the bank in which it is serviced and indicate the current account number. This will be the main account of our counterparty for non-cash payments.

In 1C 8.3 there is a built-in check to ensure that the account number you entered is correct. And if an error is made, the system will notify you about it.

If we go to the counterparty’s card using the “Bank Accounts” hyperlink, we will see that our account was automatically added there and set as the main one. You can add other accounts to this list.

Documentation
On the “Documents” tab of the counterparty’s card, you can view or create specific documents for it. These include, for example, implementations, returns, etc.

Treaties
When working with a counterparty, be it a purchase, sale or other actions, we enter into an agreement with him. In the future, it is selected in the relevant documents. All agreements with our counterparty are displayed on the corresponding tab of his card in the directory.

Let's create a new contract from this list. The most important thing is to correctly indicate its type (with supplier, buyer, etc.).

The same counterparty may have several contracts, including those with different types. For example, our company produces office chairs. We can purchase materials for their manufacture from any organization, and in this case we will sell them a batch of our chairs.
Fill out the basic fields and write down the agreement.

You can designate an agreement as the main one from the list of all counterparty agreements. Then he will have the corresponding sign in the first column (green flag).

You can also attach a file to the agreement, for example, a scanned copy of a signed paper agreement or copies of the counterparty’s documents
Watch also the video about filling out and working with the “Counterparties” directory in general: